How to Automatically Create Facebook Ad Creatives For Your Landing Pages
Learn how to automate Facebook ad creation using no-code tools like Figma, Placid, Airtable, and Make.com. Save time and scale your campaigns with ease.
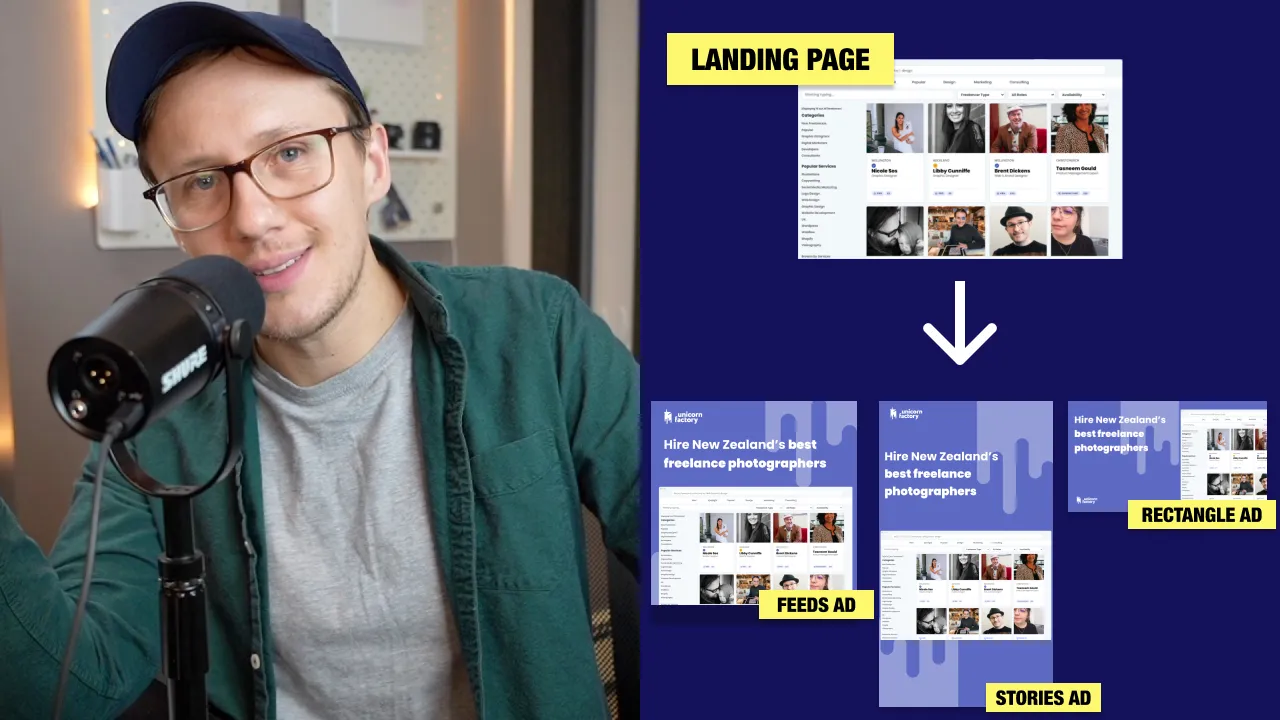


Step 1: Design Your Ad Concepts in Figma
Start by conceptualizing your ads in Figma, a design tool that lets you create and iterate quickly. Create three variations to suit Facebook's most common ad placements:
- Feed Ad
- Stories Ad
- Rectangle Ad
Tips for Designing in Figma:
- Use placeholders for dynamic elements like headlines, images, and links.
- Test your designs with real data to ensure scalability.
- Opt for simple designs that accommodate automated updates, such as screenshots instead of cutout images. For example, in previous campaigns for Unicorn Factory, I used freelancer profile cutouts, but switching to screenshots streamlined the workflow for automation.
Step 2: Automate Ad Creation with Placid
Placid is a design automation tool that allows you to create dynamic graphics at scale. Here’s how to set it up:
1. Create a Template
- Choose a base template or create your own in Placid.
- Set dimensions based on your Facebook ad placements (e.g., Feed, Stories, Rectangle).
2. Customize Your Template
- Add background colors, logos, and placeholders for dynamic content.
- Use Placid’s browser frame layer to include screenshots of your landing pages.
3. Define Dynamic Elements
Mark dynamic elements like:
- Headlines: These will vary for each landing page.
- Screenshots: Displayed content specific to each ad.
Step 3: Connect Placid to Your Database with Airtable and Make.com
To generate ads dynamically, you’ll need to connect Placid to a data source like Airtable, a database tool that combines the flexibility of spreadsheets with the power of a database. Using Make.com (formerly Integromat), you can link Airtable with Placid to automate the process.
1. Set Up Airtable
- Create a table to store your landing page details, including:
- Page titles (for headlines).
- Screenshots.
- URLs.
2. Integrate Airtable with Placid Using Make.com
- Use Make.com’s drag-and-drop interface to create a scenario.
- Set up a trigger for new entries in Airtable.
- Add an action to send data from Airtable to Placid.
3. Run Your Workflow
Trigger the workflow to generate ad variations automatically. Outputs will populate in Airtable fields, ready for download or direct use.
Step 4: Generate and Manage Your Ads
After configuring the workflow, you can generate hundreds of ads with just one click. Here’s how to manage them effectively:
1. Trigger on Demand
Run your workflow manually or set it to trigger via a webhook whenever a new landing page is added to your database.
2. Organize Outputs
- Store generated images and URLs in dedicated Airtable fields, such as:
- Feeds Ad URL
- Feeds Ad Image
3. Use Across Platforms
Besides Facebook, these assets can be reused as:
- Open Graph images for social media shares.
- Visuals for other ad platforms like Instagram or LinkedIn.
Step 5: Scale and Optimize
Once your workflow is up and running, focus on scaling and optimization:
- Test Different Ad Variations: Use multiple templates in Placid to see what resonates best with your audience.
- Leverage Analytics: Monitor click-through rates and conversions to refine your ads.
- Expand Integrations: With tools like Make.com, you can automate additional assets, such as email banners or website graphics. By leveraging Figma for design, Placid for automation, Airtable for data management, and Make.com for workflow integration, you can generate hundreds of personalized ads with minimal effort. With a streamlined process like this, your Facebook advertising strategy can scale alongside your business.
Ready to learn more? Check out our Playbooks for step-by-step guidance.
View PlaybooksContinue Reading