
How To Build A Local Directory Website in 2025 (Step-By-Step)
Explore the original Running Directory build, including four pages, Airtable schema, syncing, current filters, and test steps.
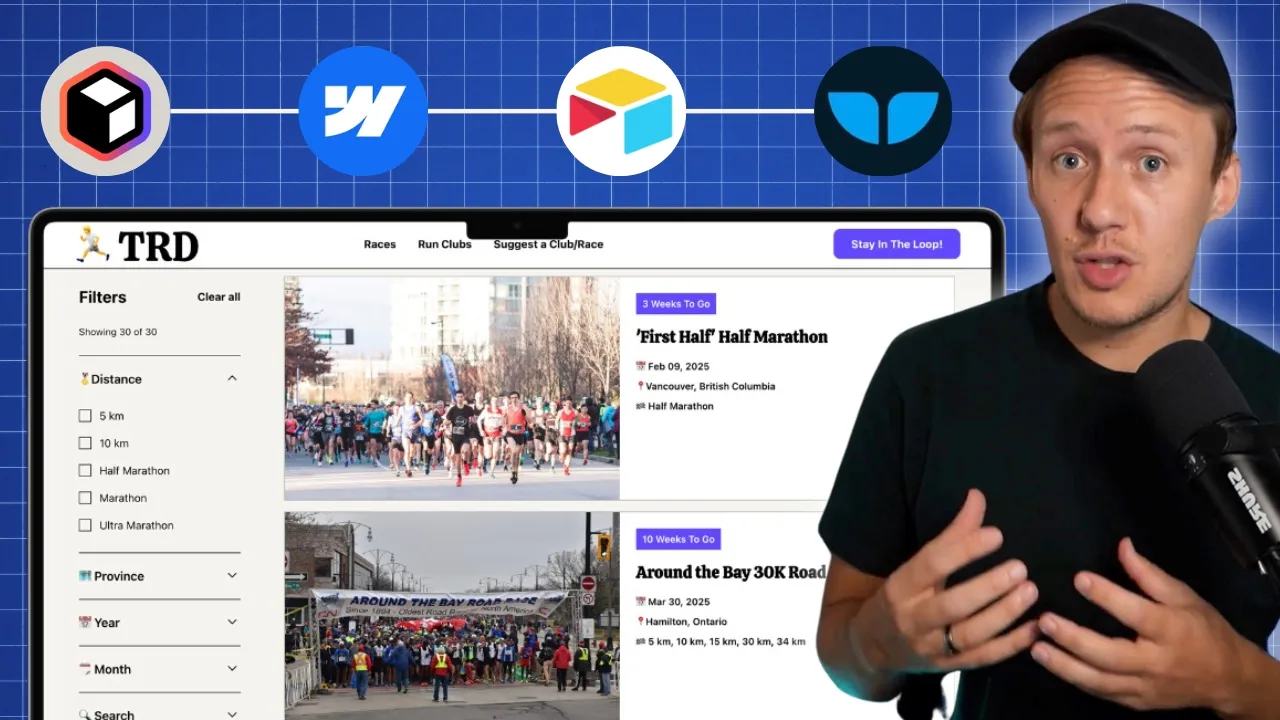
 Airtable
 Webflow
 Finsweet
 Whalesync
 Relume
This guide describes my original 48-hour no-code build of The Running Directory. The stack describes that version’s design choices.
Start by choosing a directory niche. Then build one useful path through the directory.
Why Build a Local Directory Website?
Okay, so here’s the deal—I didn’t just start The Running Directory because I love organizing spreadsheets (although Airtable does make that fun). I started it because I love running, and I wanted to make it easier for other people to get into this amazing sport. Seriously, running has been life-changing for me. It’s not just about getting fit (though, yeah, it helps), but it’s also a way to travel, explore new places, and, honestly, meet some of the coolest people ever. But here’s where things get even more interesting: a local directory like this isn’t just a great resource for the community. It’s also an incredible way to open doors and create business opportunities you might not have even thought of yet.
Let me break it down:
- You’re Creating Value for the Community
- Think about how overwhelming it can be for someone new to running. They don’t know where to find races, how to connect with running clubs, or even what kind of gear they need. A directory like this solves that problem for them. It becomes the go-to resource that makes their life easier and helps them fall in love with running the way you did.
- You’re Building Trust (And That’s a Big Deal)
- When you’re the person making it easier for runners to find races or meetups, they start to trust you. And trust is everything when it comes to opportunities down the road. When someone’s scrolling your site and finding their next big race or discovering a local running group, you’re becoming a part of their journey. That connection is powerful.
- There’s So Much Business Potential Here
- I’ll be honest—last year, I spent a small fortune on running shoes, race entries, gels, and physios. If you’re into running, you know the costs can add up. By building a resource like The Running Directory, you’re setting yourself up to partner with businesses in this space. Running stores, race organizers, physios, and even brands that make energy gels or gear? They all want to connect with your audience. And once you’ve got the trust of the community, it’s so much easier to build those relationships.
What Tools You’ll Need to Build Your Local Directory
Alright, so you’re sold on the idea of building a local directory—great! Now, let’s talk tools. The best part about creating something like this is that you don’t need to be a coder or spend months building. Choose tools that support your first useful customer task. Here’s what I used to build The Running Directory in just 48 hours:
- Webflow
- This is the backbone of your website. Webflow lets you design and host your site without writing a single line of code. Plus, it has a built-in CMS (Content Management System), which is perfect for managing dynamic content like race listings and running clubs.
- Airtable
- Think of Airtable as your supercharged database. It’s where all the details about races, clubs, and locations live.
- Whalesync
- Whalesync connects Airtable to Webflow, syncing your data in real time. Check the sync result and Webflow publishing state after changing a record.
- Relume Components
- Designing a website can be a time suck, but not with Relume. It’s a library of pre-built Webflow components that let you assemble a professional-looking site super quickly.
- Finsweet Attributes (CMS Filter)
- User experience matters, especially in a directory. Finsweet’s CMS Filter makes it easy for users to find exactly what they’re looking for.
How To Build Your Directory Site in Webflow
Webflow supplied the original directory’s page design and CMS. Here’s how I used Webflow to design The Running Directory quickly and effectively:
Start Simple: Focus on Four Key Pages
Instead of overloading yourself with features, start with the basics. For The Running Directory, I built these four essential pages:
- Homepage: A clean, welcoming page that explains what the site is about and guides users to races and clubs.
- Races Listing Page: Includes search and filter functionality to help users find upcoming races.
- Clubs Listing Page: Similar to the races page but focused on running clubs by location.
- Contact Page: A simple form where users can suggest new races or clubs or reach out for more information.
Keeping the first iteration of your site simple is key. You can always expand and add features later.
Speed Up Design with Relume Components
If you’re anything like me, you don’t want to spend hours tweaking designs. This is where Relume Components come in.
- What Are Relume Components? Think of them as pre-built, professional-quality blocks for Webflow. They include everything from navigation bars to section layouts. If you want to learn more about Relume, check out this post on some of the key features.
- How I Used Them: Instead of designing every section from scratch, I picked components that matched the directory’s vibe and customized them. This saved me hours.
Pro tip: Customize the styles, like colors and fonts, to match your brand. This keeps everything looking cohesive while saving you the time of starting from scratch.
Use Webflow CMS for Dynamic Pages
Here’s the beauty of Webflow: you can use its CMS to create dynamic, reusable templates. For example:
- Race Listings: Each race pulls data from the CMS, such as the event title, location, date, and image. When you add a new race in the CMS, Webflow automatically generates a new race card for the listings page.
- Club Profiles: Same idea here—add club info like name, city, and description, and Webflow takes care of creating profile pages.
This setup is perfect for directories because it saves you from manually creating pages every time you add new content.
Keep It Clean and Functional
One mistake I see a lot is cramming too much onto the page. Remember, the goal is to make it easy for users to find what they need.
- Use clear headings and call-to-actions (CTAs). For example, “Find a Race Near You” or “Join a Local Running Club.”
- Make sure your design is mobile-friendly. Many users will be browsing from their phones, especially when searching for races or clubs on the go.
With your Webflow site designed and your CMS set up, you’ve got the foundation of your directory. Now it’s time to bring your database into the mix. In the next section, I’ll walk you through how to build and organize your directory’s backend with Airtable. Let’s keep going!
How To Build Your Directory Database in Airtable
Once you’ve got your website design sorted in Webflow, it’s time to handle the backbone of your directory: the database. For The Running Directory, I used Airtable to manage all the data for races, clubs, cities, and provinces. Airtable is like a spreadsheet on steroids—it’s flexible, easy to use, and powerful enough to keep everything organized and dynamic. Here’s how I set up my Airtable base:
Set Up Key Tables
Your Airtable base will be made up of different tables, each representing a key part of your directory. For my project, I created the following:
- Races Table
- Includes details like:
- Race title
- Location (linked to the Cities table)
- Event date
- Images
- Registration link
- Clubs Table
- Similar to the Races table but focused on running clubs:
- Club name
- City (linked to the Cities table)
- Description
- Meeting times and locations
- Cities and Provinces Tables
- These tables are used to keep everything consistent across your database. For example, each race and club is linked to a specific city and province, which makes filtering and organizing super easy.
Add Formula Fields for Extra Functionality
One of Airtable’s coolest features is formula fields, which can automatically calculate or display data based on other fields. For example:
- Countdown to Race Day
- I added a formula field that calculates how many days are left until each race. This lets me display dynamic labels like “10 days to go” on the race cards in Webflow.
For a date field named Event Date, start with this Airtable formula:
IF({Event Date}, DATETIME_DIFF({Event Date}, TODAY(), 'days'))
Check today, tomorrow, a past event, and an empty date. Keep the timezone consistent with the displayed event date.
A synced countdown only changes publicly after refresh and publication. It is not a live browser timer.
Keep Your Data Clean and Organized
When you’re building a directory, messy data is your worst enemy. Here are a few tips to keep things tidy:
- Use consistent naming conventions (e.g., always list cities as “City, Province”).
- Add dropdown fields or linked records for repetitive data like provinces to avoid typos.
- Regularly review your tables to ensure everything is up to date and accurate.
How To Sync Airtable and Webflow with Whalesync
Now that your Airtable database is ready, it’s time to connect it with Webflow. This is where Whalesync comes in—a tool that makes syncing data between Airtable and Webflow effortless. It automates the process of updating your Webflow CMS every time you make a change in Airtable, saving you hours of manual work. Here’s how I used Whalesync to bring The Running Directory to life:
Step 1: Set Up Your Whalesync Account
Getting started with Whalesync is super simple:
- Sign Up: Create a Whalesync account and log in.
- Connect Airtable: Link your Airtable base to Whalesync.
- Connect Webflow: Authenticate your Webflow site to give Whalesync access to your CMS collections.
Step 2: Map Your Tables to Webflow Collections
Whalesync works by linking your Airtable tables to the corresponding CMS collections in Webflow. For example:
- Races Table in Airtable connects to the Races Collection in Webflow.
- Clubs Table in Airtable connects to the Clubs Collection in Webflow.
During setup, Whalesync will automatically detect fields that match between Airtable and Webflow. Pro tip: Use identical names for fields (e.g., "Event Date" in both Airtable and Webflow) to make mapping even smoother.
Step 3: Enable Bidirectional Sync
The original setup used two-way syncing:
- If you update a race in Airtable, the changes will automatically reflect on your Webflow site.
- If you edit something directly in Webflow, like a club description, Whalesync will push that update back to Airtable.
Choose an editing owner for each field. Test conflicts, removals, and sync errors before enabling two-way editing.
Step 4: Use Filters to Control Your Data
You don’t want every single record in Airtable showing up on your site. For example, maybe you’re still working on adding details for a new race, and it’s not ready to go live yet. Here’s how I handled this:
- Status Field: In Airtable, I added a “Status” field for each record (e.g., Active, Draft).
- Sync Only Active Records: In Whalesync, I set up a filter to sync only the records marked as “Active.”
This gives you full control over what appears on your site while still allowing you to manage everything in Airtable.
Step 5: Test Your Sync
Before you go live, make sure everything works as expected:
- Add a new race or club in Airtable.
- Watch it appear automatically in Webflow.
- Update a record in Webflow and confirm the changes sync back to Airtable.
If anything looks off, double-check your field mappings and filters in Whalesync.
Now that your Airtable database and Webflow site are connected, it’s time to populate our database with some data, that is what we are covering next:
How to Find and Populate Data for Your Directory
Once your site structure is set up and your database is ready, the next big step is filling it with high-quality, relevant data. This might sound like a daunting task, but with the right approach, it can actually be pretty straightforward—and even fun. For The Running Directory, I focused on gathering data for races and clubs in Canada. Here’s how I approached it:
Start with the Obvious Sources
Most of the information you need is already out there—you just need to gather it:
- Social Media: Many running clubs and races have Instagram profiles or Facebook pages. I found that Instagram was especially helpful because clubs often list their meeting times, locations, and links in their bios.
- Event Websites: Check out popular race directories or event-hosting platforms in your niche. For example, a quick search for “running races Canada” will bring up several sites with event details.
- Local Communities: If you’re part of the community already, leverage your network. Ask friends, fellow runners, or organizers for recommendations or direct links to races and clubs.
Use Tools to Speed Up the Process
Manually entering data can be time-consuming, so I used a few tricks to speed things up:
1. Airtable Web Clipper
- Airtable’s Web Clipper is a browser extension that lets you save data directly from websites into your Airtable base.
- For example, if I came across a running club’s Instagram page, I could clip the name, bio, link, and even the profile image straight into Airtable with a few clicks.
2. Automate Enrichment
- Once I had the basics like club names and links, I enriched the data by pulling additional details from their websites or descriptions (e.g., meeting times or specific race details).
- Pro tip: Use formulas or text fields in Airtable to clean up and structure the data for consistency.
Focus on Quality Over Quantity
In the early stages, it’s better to have fewer, high-quality entries than a massive list of incomplete or inaccurate ones. I prioritized:
- Races with full details (name, date, location, registration link).
- Clubs with accurate meeting times and city locations.
- Data that users would find helpful and actionable.
Organize and Categorize Your Data
To make your directory as useful as possible, think about how users will search for information. For The Running Directory, I categorized data into:
- Races by Location: Users can search for events near their city or province.
- Clubs by City: Makes it easy for someone to find a running group close to home.
- Tags: Adding tags like “Marathon,” “Trail Running,” or “Weekly Meetup” made it easier to filter results later.
Keep Expanding Over Time
Your first version of the directory doesn’t need to have every possible entry. Start small and focus on adding more over time. I also included a Contact Page where users could suggest new races or clubs, which helped me crowdsource data while building connections with the community. Once your database is seeded with quality data, it’s time to make it functional and interactive. In the next section, I’ll show you how to use Finsweet CMS Filter to give users powerful search and filtering options, so they can find exactly what they’re looking for. Let’s keep building!
Add current search and filters
The original demonstration uses older Finsweet CMS Filter attributes. New builds should use one consistent version.
Finsweet’s current List Filter guide documents Attributes v2. Do not combine v1 and v2 attributes.
Add its script once inside the page head:
<script async type="module"
  src="https://cdn.jsdelivr.net/npm/@finsweet/attributes@2/attributes.js"
  fs-list></script>
Add fs-list-element="list" to the Collection List. Add fs-list-element="filters" to the filter form.
Use the same field identifier on the filter control and the text inside each Collection Item. For example:
<!-- Illustrative filter form; put this outside the Collection List. -->
<form fs-list-element="filters">
  <label for="race-location">City</label>
  <input id="race-location" type="text" fs-list-field="location">
</form>
<!-- Inside each CMS Collection Item, bind this text to its city. -->
<span fs-list-field="location">Toronto</span>
The span shows a test value. Bind it to your CMS city field before using the page with real listings.
Publish to a test domain first. With Toronto and Vancouver test listings, check matching city results and an unmatched search.
Clear the filter and confirm both records return. Repeat around 390px and confirm keyboard access.
If your list spans multiple pages, check loading behavior separately. A filter over loaded items may miss unloaded records.
These steps describe an acceptance check. They do not establish that your page has passed it.
How To Turn Your Local Directory Website Into A Business
Now that your local directory is live and fully functional, it’s time to think about how to make it sustainable—and profitable. Whether your goal is to create a steady revenue stream or simply cover your costs, there are plenty of ways to monetize your directory while continuing to grow its reach and impact.
1. Start with Community-Centered Monetization
In the early stages, your focus should be on building trust and delivering value to your audience. Instead of immediately plastering your site with ads, consider offering services that enhance the user experience:
- Premium Listings: Offer race organizers or running clubs a chance to feature their events or clubs at the top of your listings.
- Sponsored Content: Collaborate with brands or businesses that align with your niche (e.g., running gear stores or physiotherapists) to create helpful sponsored articles or resources.
- Affiliate Links: Add affiliate links for running-related products like shoes, apparel, or energy gels. When users click and buy, you earn a commission.
2. Expand Your Offerings
As your directory gains traction, you can add more categories and features to attract new users and monetization opportunities:
- Services for Runners: Include sections for running coaches, physiotherapists, or nutritionists. These services are highly relevant to your audience and offer great partnership potential.
- Promotional Packages for Events: Work with race organizers to create exclusive promotions, like discounted registration fees, in exchange for a small cut of the revenue.
- Job Board: Consider adding a job board for roles in the running or fitness industry, like event volunteers or trainers.
3. Use SEO to Grow Your Traffic
Search Engine Optimization (SEO) is key to making your directory visible to a wider audience. Here are some tips:
- Target Niche Keywords: Focus on specific keywords like “5K races in [City]” or “best running clubs in [City]” to attract local searches.
- Create Helpful Blog Content: Write articles that answer common questions, such as “How to Train for Your First Marathon” or “Top 10 Running Races in Canada.”
- Optimize Your Listings: Include detailed, keyword-rich descriptions for each race or club. This not only improves user experience but also helps with search rankings.
4. Build Relationships with Your Audience and Partners
Growing a directory isn’t just about adding more listings; it’s about becoming a trusted name in the community. Here’s how:
- Engage with Users: Respond to feedback, update listings regularly, and add features your users request.
- Collaborate with Businesses: Reach out to local running stores, brands, and event organizers to form partnerships. Being the go-to resource in your niche opens up so many opportunities.
5. Keep Iterating and Expanding
Your directory doesn’t have to stay the same forever. As you learn what your audience needs, you can add new features, services, or categories. Whether it’s expanding into new niches (e.g., trail running or cycling) or launching in other regions, the possibilities are endless. Start with one city, a small checked dataset, and working search. Review the first user feedback before expanding.
Original video
Keep learning
More guides, free videos and course access for existing members, all in one place.
Go to LearnRather have it built for you?
We'll match you with vetted agentic talent who build it with AI, inside the tools you already use.
Schedule a callRelated posts

How to Monetize a Directory Website with Paid Online Communities
A directory can introduce vendors to a paid community. The community needs its own useful offer beyond exposure on your website.

Build Directory Category and Location Pages for Long-Tail Searches
Design directory category and location pages with useful listings, unique URLs, checked sync behavior, and realistic SEO expectations.

How to Build a Directory Outreach System
Prepare directory outreach drafts using listing previews and videos. Keep sends manual and track replies and stop rules.