
How to Build an SEO-Friendly Directory Listing Page in Webflow (Step-by-Step Guide)
Build a directory listing page with Webflow CMS and current Finsweet filters, then check usability and indexing separately.
 Airtable
 Webflow
 Whalesync
 Relume
The listing page is the most important part of your directory—it’s where users browse, filter, and find what they need. A well-structured listing page isn’t just about design; it also plays a huge role in SEO and user experience. If people can’t navigate your site easily, they’ll leave. If search engines can’t crawl your content properly, you won’t rank. That’s why we’re following a step-by-step process to make sure your listing page is functional, dynamic, and optimized from day one. Here’s what we’ll cover:
- Set up your Webflow project – Clone the Relume Style Guide so your design system is clean and consistent.
- Build the listing page – Import the right components, structure the layout, and get everything looking sharp.
- Set up Webflow CMS – This is where your listings live, making your page fully dynamic.
- Connect Airtable as your database – Use Airtable to keep everything organized and easy to manage.
- Sync Airtable and Webflow with Whalesync – With Whalesync, your data stays in sync automatically—no manual updates needed.
- Set up filtering and search with Finsweet Attributes – So users can quickly find what they’re looking for.
- Finalize and optimize – Polish up the design, tweak SEO settings, and make sure everything runs smoothly.
Each step builds on the last, making sure your listing page is structured, functional, and built to scale. Now, let's get into Step 1: Setting Up Your Webflow Project and lay the groundwork for your directory.
Step 1: Setting Up a Webflow Project for Your Directory Listing Page
Before you start building your listing page, you need to set up your Webflow project properly. This means creating a clean design system that keeps everything consistent and easy to scale. The best way to do this is by using the Relume Style Guide, which gives you a structured starting point with reusable styles and components.
1. Clone the Relume Style Guide
First, you need to get the Relume Style Guide into your Webflow project:
- Go to the Relume Webflow Style Guide
- Click Clone in Webflow to create a new project
- Rename your project and add it to your Webflow dashboard
2. Install the Relume Chrome Extension
The Relume Chrome Extension makes working with components even easier by enabling Class Sync, so your styles automatically apply when importing new sections.
- Download the Relume Chrome Extension
- Enable Class Sync to make sure your styles carry over to imported components
3. Style Your Relume Style Guide
Before moving forward, take a few minutes to customize the Style Guide to match your brand. This will make sure all imported components inherit the right styles automatically.
- Update fonts to match your brand’s typography
- Adjust colors to align with your brand identity
- Check global styles to ensure buttons, headings, and body text look consistent
Once this is set up, you’ll have a solid foundation to start building your listing page without having to go back and fix styles later. Now, let’s move on to Step 2: Building Your Listing Page.
Step 2: Designing an SEO-Friendly Directory Listing Page
Now that your Webflow project is set up, it's time to build the core structure of your listing page. We’ll be using Relume Components to quickly assemble a clean, professional layout.
1. Import Relume Components
Start by bringing in the key elements that make up your listing page:
- Add a Header – This should include an H1 title and a short description to set the context for the page.
- Import a Filters Section – This will allow users to refine their search and quickly find relevant listings.
- Choose a Stack Grid Layout – Depending on your directory, you can use stacked lists or grid layouts to display your listings.
Relume components provide a starting layout. Check their spacing and responsive behavior after applying your styles.
2. Clean Up the Listing Page
Once you’ve imported your components, it’s time to refine the structure:
- Add the remaining sections – This includes navigation, a footer, and any supporting sections you need.
- Remove unnecessary content – Get rid of any placeholder text, sections, or components that don’t fit your use case.
- Update the page copy – Make sure your headings, descriptions, and CTAs are clear and optimized for SEO.
At this stage, your listing page layout should be complete. Next, we’ll focus on making it dynamic by setting up the Webflow CMS in Step 3: Setting Up Your Listing Section.
Step 3: Connecting Webflow CMS for Dynamic Listings
Now that your listing page structure is in place, it’s time to make it dynamic by setting up Webflow’s CMS. This will allow your listings to be updated automatically as you add new entries, making your directory scalable and easy to manage.
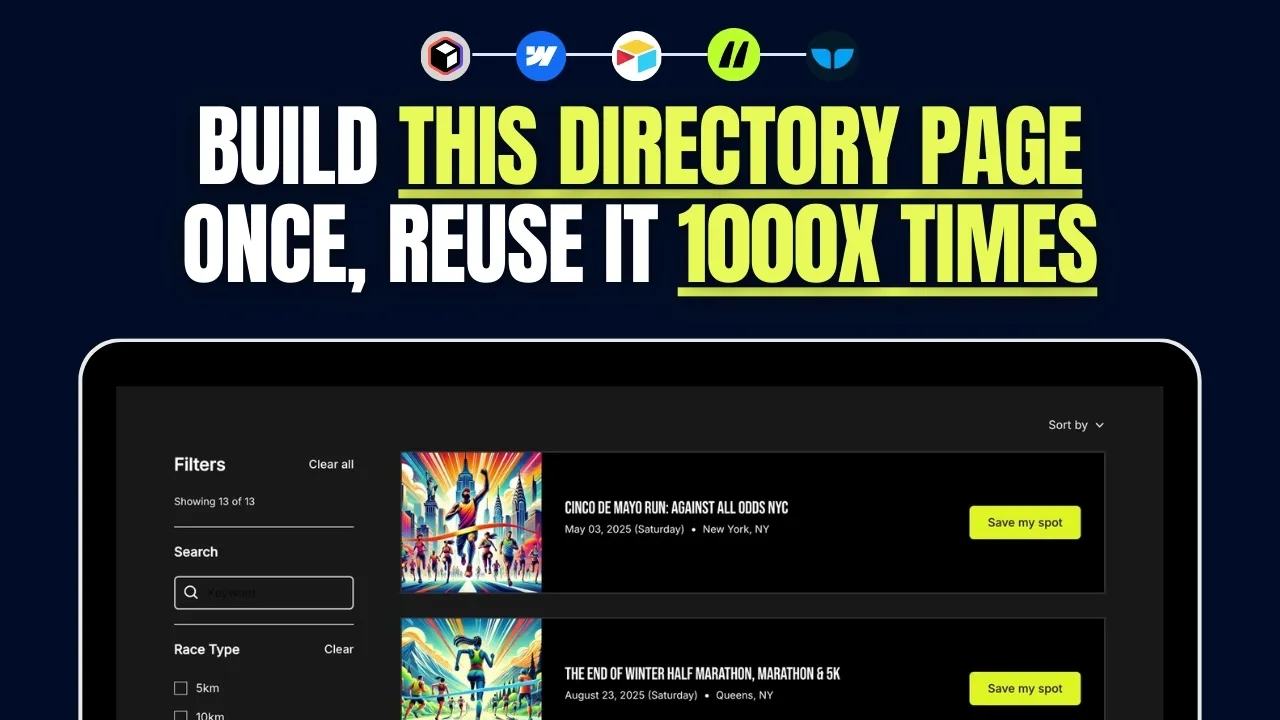
1. Create a Static Listing Card
Before linking your CMS, you need a listing card design that serves as the template for each listing.
- Design a single listing card using static placeholder content.
- Include key elements like:
- Image – A featured image for each listing.
- Title – The name of the listing.
- Date – When the event or service is available.
- Location – The relevant city or region.
- Call-to-Action – A button or link that directs users to more details. This card will act as the foundation for displaying dynamic content from the CMS.
2. Set Up the Webflow CMS Collection
Now, let’s create a CMS collection that will store all your listings.
- Go to Webflow CMS and create a new collection for your directory.
- Add fields that match the elements on your listing card, such as:
- Name (Plain text)
- Image (Image field)
- Date (Date field)
- Location (Plain text or multi-reference field)
- CTA Link (URL field) Once this is set up, Webflow will dynamically generate new listings based on the data you input.
3. Map the CMS Fields to the Listing Card
Now, it’s time to connect the CMS to your listing card so the content updates automatically.
- Replace your static content (text, images, and buttons) with CMS fields from your collection.
- Use Webflow’s bindings to ensure that the title, image, date, and location dynamically update.
- Preview your page to confirm that CMS data is populating correctly in your listing card.
4. Add More CMS Items & Refine Styling
Once your dynamic setup is working, it’s time to test and refine.
- Add multiple test listings to your CMS to see how they appear on the page.
- Adjust spacing, typography, and layout to make sure listings are easy to read and visually appealing.
At this point, your listing page should be fully dynamic, with data pulled from Webflow’s CMS. Next, we’ll connect an external database to Webflow in Step 4: Setting Up Airtable as Your Database.
If you need to want to know how to find high-quality data for your directory to set this up, check out my video or blog post on it.
Step 4: Using Airtable to Manage Your Directory Listings
To keep your listings organized and easy to update, we’ll use Airtable as the backend database. Airtable makes it simple to manage your data, whether you're adding records manually or importing from other sources. Plus, when connected to Webflow, it ensures that your listings stay up to date without manual edits in the CMS.
1. Ensure Your Airtable Database Matches Webflow CMS Fields
Before syncing, make sure that your Airtable fields match your Webflow CMS fields exactly. This helps prevent errors when transferring data.
- Create a new Airtable base or use an existing one.
- Add the same fields you set up in Webflow’s CMS:
- Name (Single-line text)
- Image (Attachment field)
- Date (Date field)
- Location (Single-line text or multi-select)
- CTA Link (URL field) Check field types and references with one test record before enabling the sync.
2. Add Records Manually or Import Data
Now that your Airtable base is structured, start adding data:
- Manually input listings one by one to test the setup.
- Import bulk data from a CSV or an external source if you already have existing listings.
Airtable’s flexibility makes it easy to scale as your directory grows. Once your data is in place, we’ll move on to Step 5: Syncing Airtable and Webflow with Whalesync to automate the connection.
Step 5: Automating Webflow and Airtable with Whalesync
Manually updating your listings in Webflow can be a hassle, especially as your directory grows. That’s where Whalesync comes in. It automates the connection between Airtable and Webflow, sending mapped changes to Webflow CMS while exposing sync errors for review.
1. Connect Your Apps
First, you’ll need to set up Whalesync and connect it to both Webflow and Airtable.
- Sign up for Whalesync.
- Connect your Airtable account and select the base containing your listings.
- Connect your Webflow project and choose the CMS collection where your listings will sync.
2. Map Your Tables & Fields
Once your apps are connected, it’s time to match your Airtable fields with Webflow CMS fields.
- Select the Airtable table that contains your listings.
- Select the Webflow CMS collection where the listings will be stored.
- Map each field in Airtable (e.g., title, image, date, location, CTA link) to its corresponding Webflow CMS field.
Compare the mapped values in both systems and investigate sync errors.
3. Add Filters
To keep your Webflow CMS clean, apply filters in Whalesync so that only relevant listings sync.
- Only sync approved or active listings to prevent unfinished drafts from going live.
- Set up conditional filters to exclude outdated or incomplete records.
Once everything is mapped and filtered, your listing page will update automatically whenever you modify your Airtable data. Check both the sync result and publishing state before assuming the page changed. Now that your data is flowing smoothly, let’s move on to Step 6: Setting Up CMS Filters with Finsweet Attributes to make your listings searchable and filterable.
Add current search and filters
The original demonstration uses older Finsweet CMS Filter attributes. New builds should use one consistent version.
Finsweet’s current List Filter guide documents Attributes v2. Do not combine v1 and v2 attributes.
Add its script once inside the page head:
<script async type="module"
  src="https://cdn.jsdelivr.net/npm/@finsweet/attributes@2/attributes.js"
  fs-list></script>
Add fs-list-element="list" to the Collection List. Add fs-list-element="filters" to the filter form.
Use the same field identifier on the filter control and the text inside each Collection Item. For example:
<!-- Illustrative filter form; put this outside the Collection List. -->
<form fs-list-element="filters">
  <label for="race-location">City</label>
  <input id="race-location" type="text" fs-list-field="location">
</form>
<!-- Inside each CMS Collection Item, bind this text to its city. -->
<span fs-list-field="location">Toronto</span>
The span shows a test value. Bind it to your CMS city field before using the page with real listings.
Publish to a test domain first. With Toronto and Vancouver test listings, check matching city results and an unmatched search.
Clear the filter and confirm both records return. Repeat around 390px and confirm keyboard access.
If your list spans multiple pages, check loading behavior separately. A filter over loaded items may miss unloaded records.
These steps describe an acceptance check. They do not establish that your page has passed it.
Step 7: SEO Optimization for Your Directory Listing Page
Now that your listing page is fully functional, it’s time to polish the design, optimize SEO, and ensure everything runs smoothly. A well-structured page isn’t just about functionality—it also needs to look great and perform well across all devices.
1. Add Some Styles
- Fine-tune spacing, typography, and colors to create a clean, user-friendly layout.
- Ensure all elements are visually balanced, so users can easily browse listings.
- Double-check that buttons, images, and text blocks align properly.
2. Improve Copy & SEO
- Make sure all headings and descriptions are clear and concise.
- Optimize H1s, meta descriptions, and alt text to help search engines understand your content.
- Use keyword-rich copy in strategic places to boost your directory’s SEO.
3. Publish & Test
Before going live, run a final check across different devices to ensure a seamless experience:
- Test your page on desktop, tablet, and mobile to make sure everything is responsive.
- Try out filters and search functionality to confirm that Finsweet Attributes is working as expected.
- Check that data is syncing properly from Airtable to Webflow via Whalesync.
Check indexing separately from the filters
A working filter does not prove Google can index the page. Give important location pages their own useful content and crawlable links.
Check the published URL returns 200. Review its canonical URL, robots rules, and any noindex directive.
Inspect the URL in Search Console. Compare the indexed URL and rendered content with your intended page.
Google’s SEO guide explains discovery and indexing without promising a ranking.
A filtered browser state may share the same URL. Do not treat every filter choice as an independently indexed page.
After the listing page works, design useful detail pages with checked data and clear next actions.
Original video
Keep learning
More guides, free videos and course access for existing members, all in one place.
Go to LearnRather have it built for you?
We'll match you with vetted agentic talent who build it with AI, inside the tools you already use.
Schedule a callRelated posts

How to Monetize a Directory Website with Paid Online Communities
A directory can introduce vendors to a paid community. The community needs its own useful offer beyond exposure on your website.

Build Directory Category and Location Pages for Long-Tail Searches
Design directory category and location pages with useful listings, unique URLs, checked sync behavior, and realistic SEO expectations.

How to Build a Directory Outreach System
Prepare directory outreach drafts using listing previews and videos. Keep sends manual and track replies and stop rules.